Next.js 프로젝트 스택 검토 (2023) 대로 홈페이지를 다시 만들기 위한 첫 번째 단계로 shadcn/ui를 추가했다.

shadcn/ui 셋업
https://ui.shadcn.com/docs/installation/next의 가이드를 참고하여 shadcn/ui를 셋업한다.
다음 명령으로 shadcn-ui를 초기화한다. 설정을 위한 질문에는 모두 디폴트값을 선택한다.
npx shadcn-ui@latest init

Would you like to use TypeScript (recommended)? no / yes
Which style would you like to use? › Default
Which color would you like to use as base color? › Slate
Where is your global CSS file? › › app/globals.css
Do you want to use CSS variables for colors? › no / yes
Where is your tailwind.config.js located? › tailwind.config.js
Configure the import alias for components: › @/components
Configure the import alias for utils: › @/lib/utils
Are you using React Server Components? › no / yes
셋업이 끝나면 다음과 같이 프로젝트 내용이 변경된다.
1. components.json: shadcn/ui 설정을 담은 components.json 파일이 생성된다.

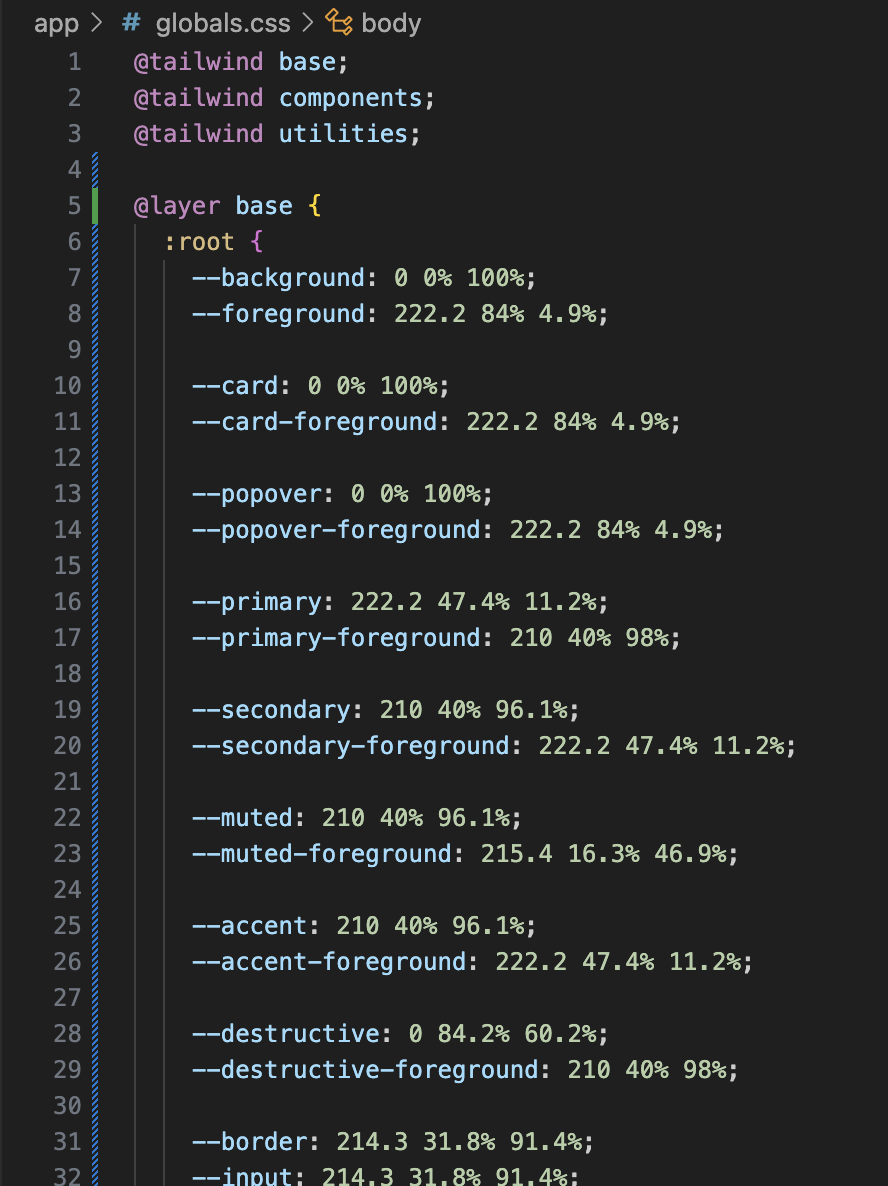
2. global.css: 아래와 같이 root에 기본 variable들이 추가된다.
3. lib/util.ts: 유틸 파일이 추가된다. 여기에는 class 이름 조합을 도와주는 cn 함수가 구현되어 있다.

4. tailwind.config.js: tailwind config 파일이 추가된다.
기존 tailwind.config.ts 파일과 합치는 것이 좋을지 검토 필요함
컴포넌트 추가
컴포넌트를 추가하려면 명령줄에서 "npx shadcn-ui@latest add" 명령을 사용해야 한다.
예를 들어, Button 컴포넌트를 추가하려면, 터미널에서 다음 명령을 실행한다.
npx shadcn-ui@latest add button
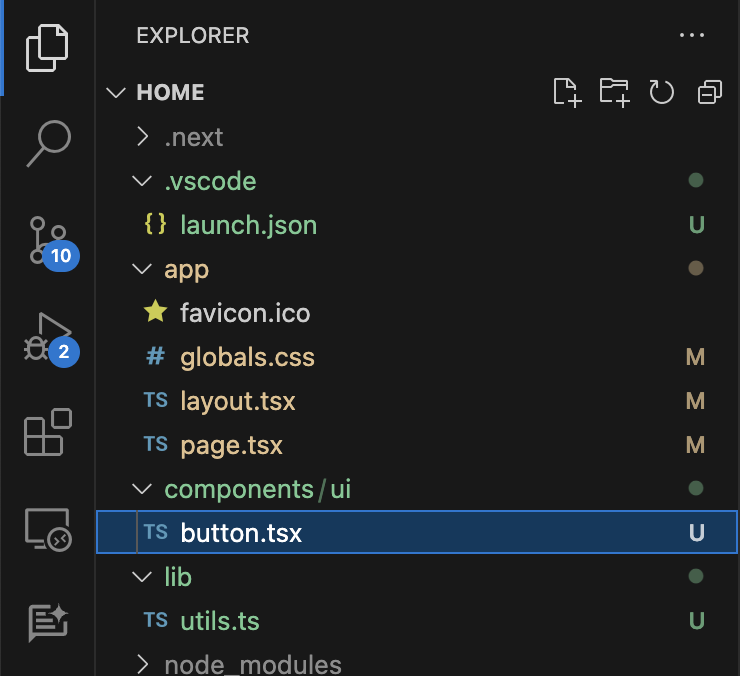
그러면, 아래와 같이 component/ui 디렉토리에 button.tsx 파일이 생성되며,
메인 page.tsx에 <Button> 컴포넌트를 삽입하면 화면에 Click me 버튼이 나오는 것을 볼 수 있다.


shadcn/ui의 모든 컴포넌트 목록은 https://ui.shadcn.com/docs/components에서 볼 수 있다.
'웹 개발' 카테고리의 다른 글
| Lucia 인증 연동 (Next.js, PlanetScale, Kysely, OAuth) (0) | 2024.01.10 |
|---|---|
| PlanetScale + Kysely 데이터베이스 연동 (Next.js) (2) | 2024.01.04 |
| Next.js 프로젝트 스택 검토 (2023) (0) | 2023.12.30 |
| Next.js 홈페이지 만들기 - 기본 레이아웃 (3/3) (4) | 2023.12.21 |
| Next.js 홈페이지 만들기 - 다크 모드 (2/3) (0) | 2023.12.19 |